Skip to content
15% Off Sitewide + Free Shipping | Use Code: BF2024

Ideas & Advice

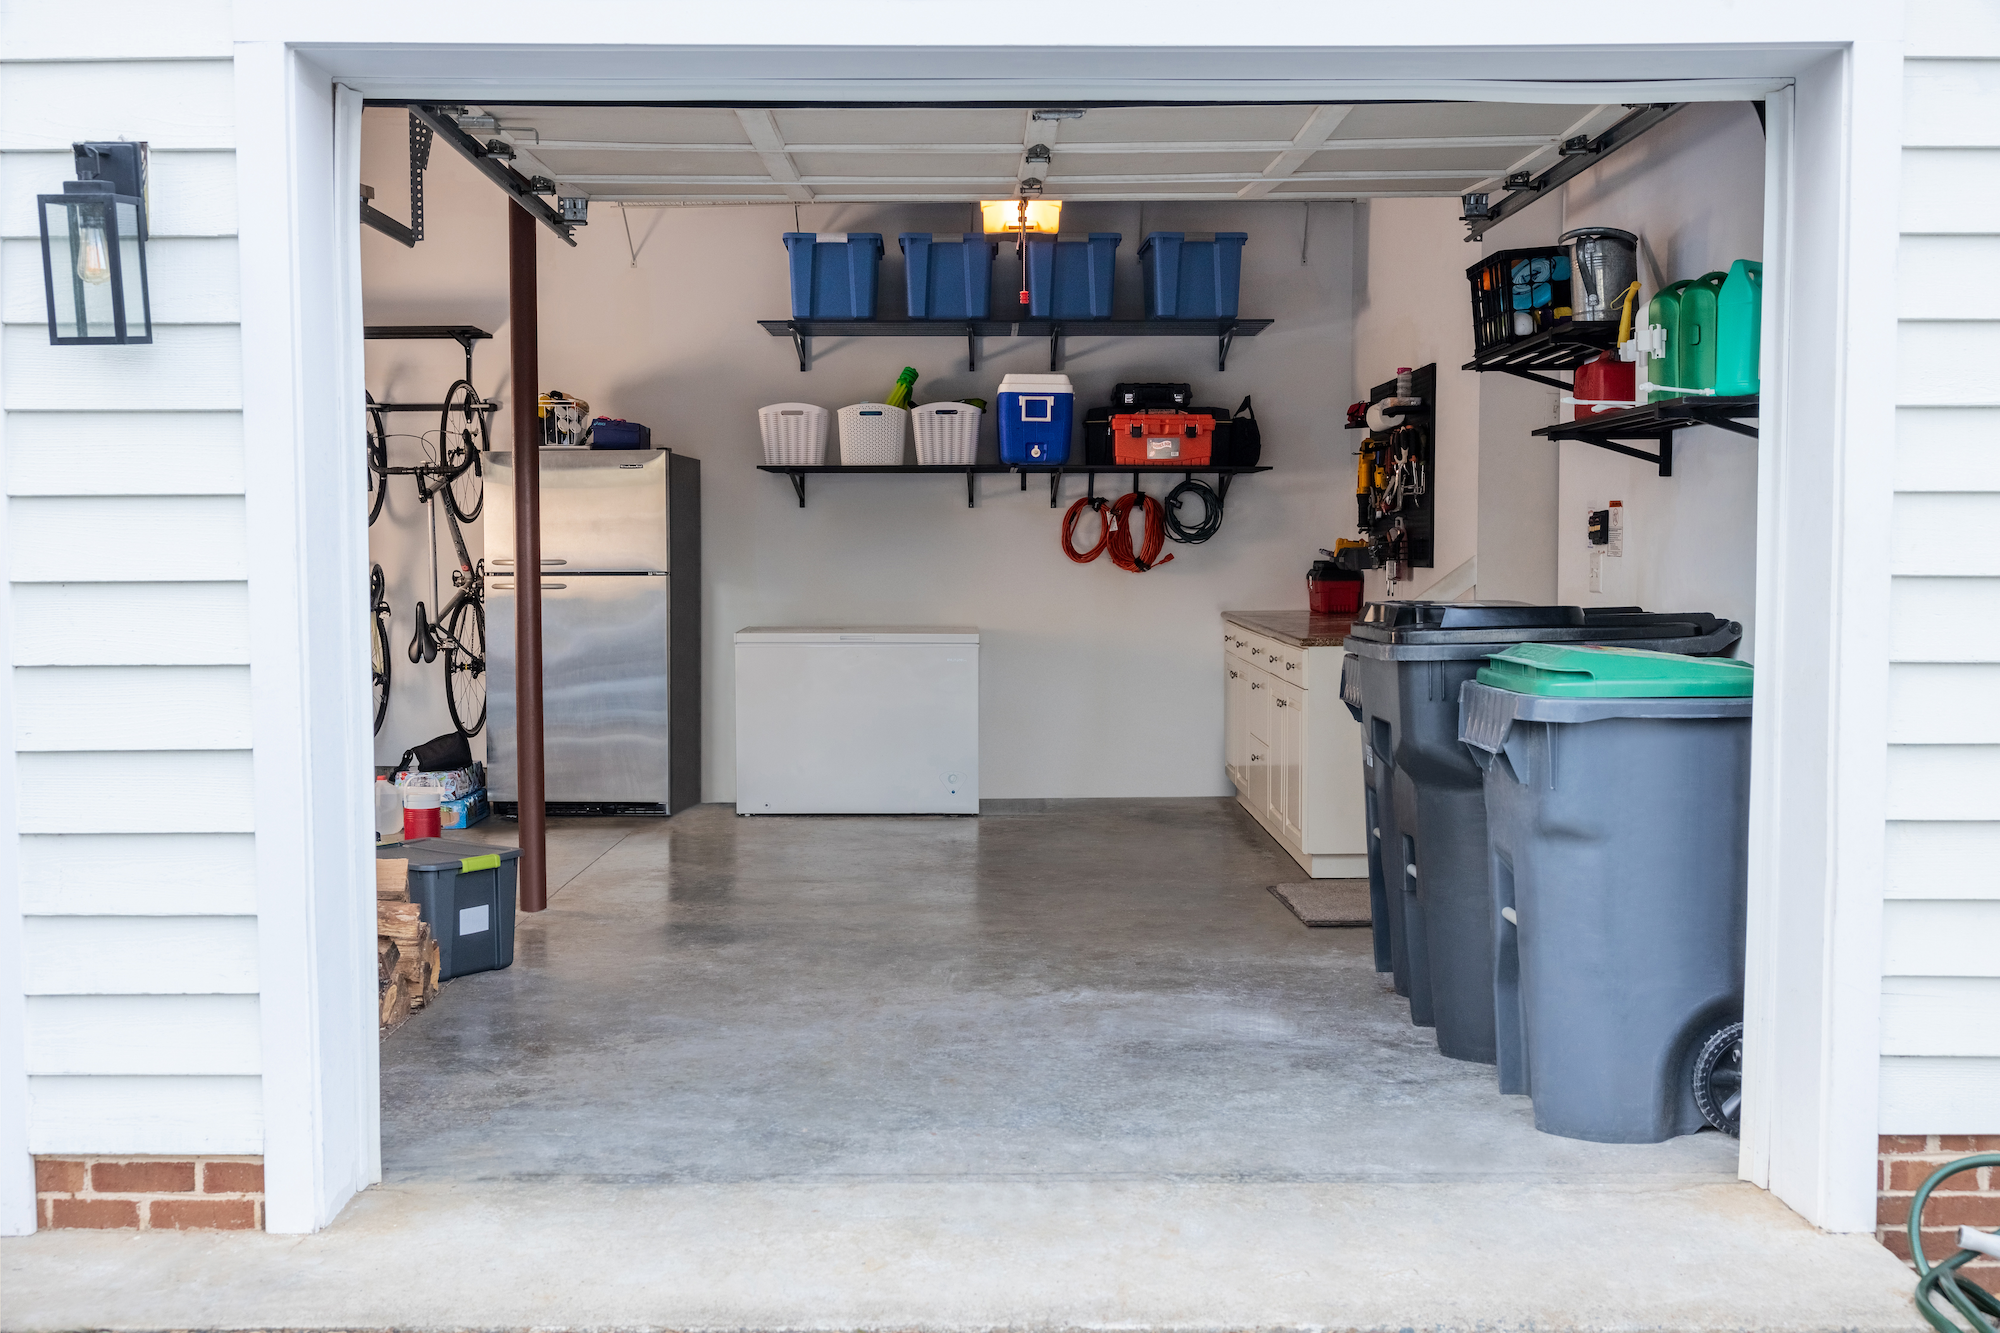
When it comes to organizing your garage, it’s easy to feel overwhelmed, especially if you’re storing bulky gear like kayaks, bikes, and seasonal equipment. Whether you’re short on space or just need to create a more efficient system, having the right setup can make a big difference. In this blog, we’ll share creative ideas and expert advice on how to maximize your garage space, from wall-mounted storage solutions to ceiling racks and freestanding units. Plus, we’ll provide guides for safely storing larger gear like kayaks and bikes. Let’s get your garage in top shape!

Wilder Family: Garage Makeover

The Wilder family, with their busy schedules and a house full of kids, needed a solution to keep their garage under control. Their space was packed with everything from sports equipment to seasonal items, making it difficult to stay organized.

Get Inspired
Family Garage Makeover Organizing Ideas
Garage makeover tips and ideas

Snow Family: Before & After

We helped the Snow family transform their cluttered garage into a functional space that supports their busy lifestyle. With a few smart upgrades, their garage became a game-changer for their daily routines.

Get Inspired
Garage Transformation Before & After
before and after garage transformation

Legacy Articles

What to Know Before You Kayak

Kayaking is a great way to enjoy being on the water while taking in nature’s beauty and getting some great exercise. It’s an activity that pretty much anyone can do with little to no training, which makes it a perfect outing for the whole family. Still, you want your voyage to be as safe as possible and you want to make sure that everyone follows the rules so you can have an enjoyable trip. Here are a few things to keep in mind before you head out on your first or next kayaking adventure: GENERAL SAFETY There are many best practices when kayaking that aren’t always official regulations, but will help make your kayaking trip safer and more enjoyable. Know your water - Remember that calm river you saw the other day that you thought would be great to take a kayak ride on with the kids? Well, it rained heavily last night and that river now has some class 5 rapids along the way. If heading into new territory, check with local experts or kayaking companies to see what the water is like in general and on that day. NOAA also has a river forecast site that can help you find out if there has been heavy rain or flooding at your destination. Lakes and ponds are typically calmer waters, but it is still best to check them out before you put in. Take a safety course - Just Google ‘kayak lessons’ and you’ll find classes in your area that can help you get started or can improve your kayak skills for more challenging waters. These are especially helpful if the water you choose to ride on can be unpredictable, as mentioned above. Get the gear - Most states will require a personal flotation device for each passenger (i.e. two if you have a tandem kayak), but even if they don’t, this is just a smart thing to have. Other things to consider are a whistle (some states require this, as well), a cell phone in a waterproof and connectable pouch, a flashlight or headlamp (especially if you are out after dusk), a paddle leash, a waterproof watch, and a towline. If you would like suggestions on kayak accessories, our expert team can help at info@storeyourboard.com. Wear the right clothes - As you have probably experienced if you have ever visited the beach at the beginning of summer, the temperature of the air is not always a good indicator of the water temperature. It is likely that when you are kayaking you will come into contact with the water below you, even if it is just when you are getting in and out. The USGS water data website has the recent temperatures of most waterways in the US and can help you decide if you should wear shorts or a full on wetsuit for your journey. If you are thinking about taking a more challenging kayak ride, such as a fishing kayak trip or sea kayaking, PaddleTV has some great videos on preparing for and enjoying your voyage.   RULES AND REGULATIONS While most kayaking rules and regulations across the country are similar, there are some slight differences among states. Even if you’ve been kayaking before, it is good to check these out before your trip, as they can change. We have compiled a list of links to state rules and resources at the bottom of this article. Just click on the state where you plan to kayak to review rules for your area. Note: During the COVID-19 restrictions, you will also want to check with the local parks department or the state website to see if the place you plan to drop in is allowing kayaking at this time and, if not, when they will possibly be opening back up. We here at StoreYourBoard hope that you have wonderful kayaking experience, and, as always, if you need a place to put your kayak after you are done, StoreYourBoard.com has all of the best racks and accessories to keep your equipment and gear safe.   Use the below list as a starting point for understanding state rules and regulations, but note that other state or local laws could apply.   Alabama Alaska Arizona Arkansas California - scroll ⅔ down the document for kayak information. Colorado Connecticut Delaware Florida Georgia Hawaii Idaho Illinois Indiana Iowa Kansas Kentucky Louisiana Maine Maryland Massachusetts Michigan Minnesota Mississippi Missouri Montana Nebraska Nevada New Hampshire New Jersey New Mexico New York North Carolina North Dakota Ohio Oklahoma Oregon Pennsylvania Rhode Island South Carolina South Dakota Tennessee Texas Utah Vermont Virginia Washington (also see the boating laws link on this page for rules) West Virginia Wisconsin Wyoming

Learn more

Choosing and Installing SUP Car Roof Racks

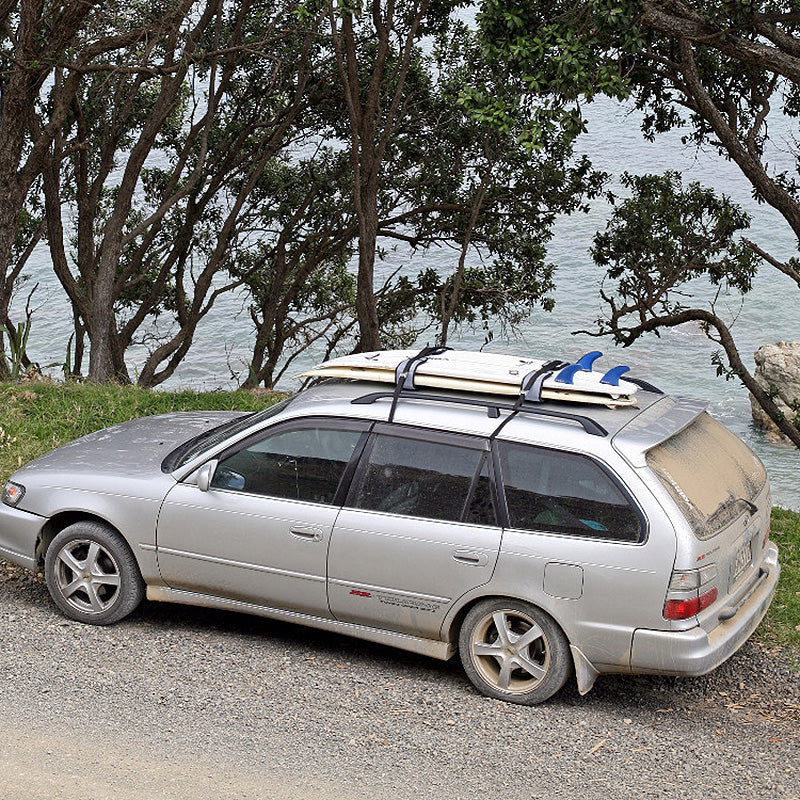
Your paddleboard is ready – you’ve screwed in your fins, strapped up your leash, maybe grabbed your wetsuit, and are ready to hit the water, whether it’s the surf, the lake, the river, the bay, or otherwise. Only thing you need to do is get your paddleboard from your house to the water. For most people, this means using a SUP roof rack to strap your SUP to the roof of your car. Seems simple – throw it on the roof, strap it up and get going – but there are a number of finer points about different roof racks and their use and setup to optimize the safety and protection of your paddleboard while it’s strapped to the roof of your car as you drive off at the crack of dawn to catch a glass session. Choosing a Paddleboard Roof Rack for Your Car There are lots of different types of paddleboard roof racks to choose from and there are a variety of price points in the roof rack market. Some are simple and affordable paddleboard roof racks, while others have more bells and whistles to strap up your SUP. In picking out your paddleboard roof rack, think about what will be the easiest rack for you to use that will fit your budget, your paddleboard and your method of transportation. With that in mind, the biggest question in picking out the proper roof rack for your paddleboard is whether your car has rack bars on its roof. Yes, Your Car Has Roof Rack Bars: Roof rack bars on your car are a bonus because they eliminate the step of having to secure your paddleboard rack to your car; instead, you secure the rack to the rack bars, which provides a very stable frame for paddleboard transport. The simplest mechanism is roof rack pads in the shape of cylinders that strap around your roof rack bars, generally with velcro. Next, you’ll need a set of tie down straps. The tie down straps will wrap around your paddleboard and the pads strapped to your rack bars to secure your SUP to your car. Very easy. But paddleboards are a serious investment and if you want to be more secure in protecting that investment, you can find higher end roof racks that provide the complete package for your paddleboards in terms of safety and security. For example, LOCKRACK's roof rack is engineered with rubberized arms to keep your SUP ding-free and includes an anti-theft locking system, so you can stop into the grocery store on the way home from your session and not have to worry about whether your paddleboard will be gone when you come out. Another solid option is this paddleboard roof rack, which uses big foam spacer blocks to secure to your car’s roof rack bars and provide robust support for two paddleboards. No, Your Car Doesn’t Have Roof Rack Bars: Even if you don’t have roof rack bars on your car there are car roof racks designed with you in mind. The standard solution to the no-roof-rack-bars problem is a roof rack designed to strap around your car’s roof and then strap around the paddleboard you put on that roof. Imagine a figure 8: the bottom loop of the 8 is a strap that wraps around the roof of your car and secures with a clamp on the underside of your roof. The top loop of the 8 is a strap that wraps around the paddleboard you will put on the roof. The middle of the 8 is pads that your SUP will rest on while it’s on top of your car. This design is generally 1 piece that is fully connected, and is not separate pads and straps. As mentioned, this is the standard roof rack for cars without roof racks bars, but you can tailor it to your needs with a few options. In addition to the fundamental design of your paddleboard roof rack, you’ve got to check out some of the finer details of the rack with your paddleboard’s safety in mind. First, for any clamp, support, or piece of the rack that will come in contact with your paddleboard, it should have padding around it. Otherwise, it could very easily scratch or ding your SUP while you’re loading it onto the roof or driving down the road. The second thing to consider is whether the rack has spacer pads (or you want to buy spacer pads separately). Some separation between your paddleboards is definitely advised if you are stacking them on top of each other, and spacers will get the job done best. Also if stacking multiple boards, the rack’s straps must have enough length to wrap around your paddleboards. If you grab a set of surfboard straps there’s a chance they might not be built for the size of paddleboards. Again, your paddleboard is a huge investment, so lock it up! For a non-locking rack, you can use locking paddleboard straps or a separate paddleboard lock system. Prepping Your Paddleboard for Roof Rack Travel We’re getting closer to strapping up your paddleboard, but there are still some maintenance items to take care of on your paddleboard before you throw it on your roof. Paddleboard Bags: You should consider putting your board in a paddleboard bag or paddleboard sock before strapping it up. This might be overkill in some situations, like a quick trip, but a lot of times it will be beneficial for your paddleboard. At the least, the bag will save your paddleboard from some sun exposure that can age the fiberglass or other materials that your board is made out of. It will also provide a layer of protection from the general debris that flies up off the road (rocks, dirt, trash, etc.) or from the car in front of you (cigarettes, trash). Also if you’ve waxed up your board and it’s hot out your wax could melt and run, even with the board facing down, but that generally won’t happen if it’s in a bag. Leashes: I advise that everyone take a couple of extra seconds and remove the leash from your paddleboard before placing it on your roof. Leashes are bound to get loose in the wind and can only cause trouble. Don’t risk something crazy happening. Remove your leash. Fins: Yes, it’s best to leave your fins in your paddleboard on a road trip as they can act as a last line of defense against your paddleboard flying off your car. Imagine your straps getting loose, and with the direction of your car forward, your SUP starts to slide backward a bit. At some point, the fin sticking up in the front of your car will catch on the straps and prevent your paddleboard from sliding any further backward. If you’re stacking a few paddleboards on one another, you’ll have to watch how you stagger them backwards to make sure your rack can support them all properly. Securing Your SUP Roof Rack to Your Car Once your paddleboard is ready to go, you can attach your SUP roof rack to your car. Because of the different roof racks, each will be attached differently, but it’s important that no matter what rack you have, you take care in installing it properly. For rack pads, velcro them on your roof rack bars tightly. For straps, clamp them down tightly and check them for any worn or weak spots. For more specialty paddleboard racks, follow the instructions and make sure they fit properly with your car. After you’ve installed the rack, do a quick post-inspection so you really know that everything is snug and secure. You don’t want to lose a paddleboard because you were in a rush and forgot to attach a part of your rack. For cars with roof rack bars, the standard setup is roof rack pads that fasten to your bars and act as a cushion between the bars and your paddleboard, and a strap system to secure your paddleboard to the rack pads. The pads fit around the roof rack bars and secure typically with velcro. Secure the two pads, one on the front rack bar and one on the back rack bar, and make sure that they’re straight, so when you set your paddleboard on them, it won’t be rubbing up against the roof rack bars at all. For cars without roof rack bars, the focus while using the one piece rack system is on securing it to your car. Set the pads out in the general area on your roof where they need to end up, One towards the front, and one towards the back. Straps will be protruding on each side of the pads. Run the straps underneath your car’s roof so that they meet in the middle, than clamp the front 2 straps together and the back 2 straps together. You’re free to clamp the straps as tightly as possibly because they secure against your metal car (different when strapping down your paddleboard). Double check that your paddleboard is resting fully on the pads and is straight (parallel with your car). If you have a small car, there are other things to consider. Paddleboards come in different sizes, but they’re all pretty big, and if you have a small car, the straps on your roof rack setup may not be wide enough apart to adequately secure your paddleboard. For example, if you’re trying to strap a rack to a car without roof rack bars, it secures underneath the roof via the inside of the car. Generally, the front strap runs through the open space created by the front door and the back strap runs through the open space created by the back door. If you have a coupe, you only have a front door. So both your front and back straps will have to be secured via that space. The distance then between your front and back roof rack pads and straps will not be that great. If you strap in your paddleboard the straps may only be 3 or so feet apart. On a 12 foot paddleboard, that leaves almost 5 feet in the front and back of the board without any support. A potential solution is to take a page from the transport of other large equipment, like canoes and kayaks, and to get additional tie downs straps that secure the front and back of the paddleboard to the bumper and trunk of your car. The point is, it is tough to transport big paddleboards on small cars without roof rack bars. Keep this in mind when planning your next SUP adventure. Paddleboards on Your Roof – Upside Down and Backward Here’s how to load your paddleboard onto the roof of your car: Bottom of the paddleboard up: Logistically, if your fins are in, the rack will only work with the paddleboard fins facing up in the air, or else your fins would hit your car’s roof. Also, you prefer not to expose your wax or board pad to the sun, so top side faces down. And generally strapping the board upside down is better for travel, based on any concave of the paddleboard. Fins in the front: It may sound like a Jimmy Buffett song, but as mentioned, in a worst-case scenario, fins act as a last line of defense against your paddleboard wiggling free and flying off your car. If your boards start to slide backward, the fins catch on the straps and restrict how far backward the boards slide. Also, it’s more likely the tail of your paddleboard is thicker and flatter, so it has more strength and better shape to cut through the air as you’re cruising down the road. Securing Your Paddleboard to Your Roof Rack Once you’ve loaded up your paddleboard, it’s time to strap it down. For cars with roof rack bars, it’s all about feeding the straps around the bars and your paddleboard in the right direction for maximum security. You’ll have two straps, one in front and one in back. Start with the clamp end of the first strap on the outside of the board, underneath the roof rack bar. Run the strap across the top width of the paddleboard to the other side of the board, underneath the rack bar, and back along the width of the board. There it will meet the clamp end, and you will tighten appropriately. Tie off the excess strap and give your paddleboard and the straps a couple of pulls to make sure nothing is loose. For cars without roof rack bars, securing the roof rack straps is a bit more straight forward. The front straps and back straps each extend from both sides of the car. Pull them up from each side over your paddleboard and secure the plain end through the clamp and tighten. Repeat for both front and back straps, once again giving the straps a couple of pulls to double check. Don’t overtighten your straps. Avoid damaging your paddleboard by wrenching your roof rack straps too tightly around it. Different paddleboards are made of different materials, but you can crack fiberglass or other board materials if you pull your straps too tight. Find that just right tightness for your paddleboard. Mind your straps. Take the extra couple of seconds and make sure your straps are straight and not twisted around your board for maximum contact and hold. Then tie off the ends of the straps, as nothing good can come from them flapping in the breeze. Stacking Multiple Paddleboards When you’re heading out with a couple of your friends and need to stack multiple paddleboards on the roof of your car, one on top of the other, a few more issues come into play. Biggest paddleboard on the bottom. The biggest paddleboard goes at the bottom of the stack of SUPs because it provides the best foundation/ stability. Watch the spacing of fins and tails. Make sure there’s some space between the tails of the paddleboards and the fins facing up from the boards below them. If you stack your SUPs too closely together, with some wiggle or if you hit a bump, the tail of one paddleboard could be cut by the fins from the paddleboard below it. Put something between paddleboards. If you’re not using a SUP bag, then the something between paddleboards can be as simple as an old towel. It’s always better to put something between the boards you stack on your roof rack rather than nothing. The best solution is a foam board spacer block. Now, you've got your paddleboard securely placed on top of your car, and you are ready to go. We hope you have an amazing session on the water. Stay safe and ride on!

Learn more

Biking During Social Distancing - Resources and Tips

With the unique situation our world is in right now, there are a lot of questions surrounding biking and what is acceptable or available during this time of social distancing. Springtime is usually the time of year that bike enthusiasts take their gear out of hibernation and hit the roads, trails, and greenways, but where can we go, and what are best practices? For those who are just taking up biking as a new activity, what are the rules? What safety precautions should we take? There are many resources available to help answer all your questions, and we compiled a short list below to give you answers and get you back out on the road or trail safely!   DURING COVID-19 PeopleForBikes is an organization that works to make bicycling better, to make it easier to access, and to ensure safer places to ride. Part of this mission includes providing information for cyclists during the pandemic on what the rules are in each state regarding outdoor recreation and essential businesses. They have created an interactive map which allows you to click on your state to see what guidance or restrictions are in place and what that means for biking. You can find the map on this page of their site: State Actions During COVID-19 Note: The requirements of each state are changing frequently, and PeopleForBikes is updating their information as quickly as possible. They also provide links to each state’s coronavirus page, so you can double check that day’s information. Also note, some regional and local governments may have stricter policies. It is always best to check your local city or county sites, as well.   READY TO RIDE? Now that you have found out when you can ride, where can you go? Many cities have closed some roads to vehicles to allow for walking and biking on these neighborhood streets during the sheltering in place period. If you are looking for more of a mountain adventure or just a larger paved trail, you can find a very comprehensive list of trails by state at TrailLink. Scroll down this page to find the link to your state, where you will find descriptions of each trail and reviews. Also available is a map where you can click to see which trails are nearest to you or you can browse by city.  Note: Some of these trails are in national parks, which may not be open to the public during COVID-19. The National Park Service has provided a state-by-state listing of their parks here, and most parks are linked with any closings or alerts listed. For local trails and roads, please visit your city or county website to see what is available for public use.   FOR NEW BICYCLISTS Riding a bike is a great way to get exercise and fresh air during a time when your options are limited. Plus, you may just find your new passion! Make sure to get off on the right foot (or should I say, pedal) by learning the rules and safety measures you should follow when riding.  If you plan to ride on paved surfaces, Road Bike Rider has a great beginner’s guide to Road Bike Riding that can help with everything from bike and gear selection to maintenance basics. If you are thinking off-road trails are more your speed, it’s great to know what trails are good for new riders and the different rules that apply. As mentioned before, TrailLink has a great list of paved and unpaved trails, but you can also visit The International Mountain Bicycling Association to find mountain trails by difficulty level (under Rides) and Rules of the Trail. The US Forest Service also gives great general rules for riding in forests or heavily wooded areas. Bicycling Magazine is also a great resource for beginner tips on everything biking.   OUR HOPE We are all looking forward to being able to ride freely in our favorite areas with friends who share our passion for biking and we hope that day will come soon. Until then, ride safe and stay healthy.   StoreYourBoard provides racks and accessories for bikes to keep your equipment safely stored and ready to ride when you are.  

Learn more

SUP PFD & Life Jacket Requirements

US Coast Guard (USCG) SUP Rules & Regulations On October 3rd 2008 the US Coast Guard (USCG) ruled that a stand up paddleboard (SUPs) is classified as a “vessel”.  To learn more, check out the USCG vessel determination page. Once SUPs were classified as vessels that made them subject to certain boating safety regulations.  Please note that this refers to Stand Up Paddleboards where the user stands on the board and uses a paddle to propel it.  (Note: “Traditional Paddleboards”, where the user uses his hands to propel the boat forward, are not subject to these rules). This guide is only an informational overview of the federal rules - it is not legal advice!  State and local governments may apply additional rules, so please consult your local authorities for additional information. Summary of the Rules Area of Use Surf or Swimming/Bathing Area - when using a SUP in either of these areas you are exempt from “carriage requirements” and so not required to have items like a PFD, whistle, or light. Other Water - whenever in an area outside of the surf break or defined swimming/bathing area, the SUP is classified as a vessel and falls into a category with other paddle craft, like a kayak. Carriage Requirements (What You Must Have while Paddleboarding) While you are in an area of “Other Water” as classified above PFD (Personal Floatation Device) Sound Producing Device Navigation Light - if on the water after sunset Visual Distress Signal (VDS) - subject to SUP length and time of day* PFD (Personal Floatation Device) / Life Jacket PFDs or Life jackets are always a good idea to have with you while on the water.  The requirements state: Children of age 12 and under are required to wear a USCG approved life vest at all times. It can be either Type I, II, or III. Make sure the life vest is the correct size for your child's weight and height.  Adults and children over 13 are required to have a PFD onboard, not necessarily on their body. Once again the PFD must be a USCG Approved Type I, II, or III. View StoreYourBoard’s collection of SUP Life Jackets Inflatable PFDs - a popular type of PFD for Paddleboarders is a belt type or suspenders type inflatable life vest.  These can only be worn by people 16 years and older. They also must be worn at all times, even by adults. View StoreYourBoard’s Collection of Inflatable SUP PFDs More details on life vests from the USCG can be found here. A nice overview of the different types of PFDs can be found here. Sound Producing Device A whistle or sound producing device must be carried to warn other boaters. Something like this SUP Saftey Whistle Navigation Lights A navigation light is required only if you are on the water after sunset and before sunrise.  SUPs and other paddle craft are only required to have a flashlight as a navigation light.  They do not need to have installed navigation lights. Visual Distress Signal (VDS) **A VDS is only required when paddling offshore and between sunset and sunrise (for typical SUPs under 16ft in length). A VDS is something like a flare that can alert other boats or rescue personnel of your location. If your SUP is 16 feet or longer you are required to carry a VDS both day and night if paddling offshore.  If your SUP is shorter than 16ft than you are only required to carry a VDS between sunset and sunrise. Required Rules to Follow as a Vessel Operator Since a SUP is a vessel there are a few other rules that need to be followed to stay safe. Navigation Rules - similar to the rules of the road there are certain rules to the water so that all types of vessels can use the water safely. USCG Navigation Rules can be found here Accident Reporting - as a vessel operator you are also required to report any boating accidents to the local reporting authority, either the USCG or other agency that have been delegated that authority. Other Notes Registration Numbers - In most states you are not required to register your SUP or display registration numbers. Hull Identification Numbers (HIN) - The USCG has waived the requirement for manufacturers to put unique HIN on Stand Up Paddleboards. Additional Resources State Boating Laws by the USCG here. Searchable Code of Federal Regulations (CFR) can be found here. Most recreational boating regulations can be found in 33 CFR between 173 and 187.

Learn more

Paddleboarding Articles

SUP PFD & Life Jacket Requirements On October 3rd 2008 the US Coast Guard (USCG) ruled that a stand up paddleboard (SUPs) is classified as a “vessel”. To learn more, check out the USCG vessel determination page. Once SUPs were classified as vessels that made them subject to certain boating safety regulations. Please note that this refers to Stand Up Paddleboards where the user stands on the board and uses a paddle to propel it... more

Learn more

Mounting and Installation Guide

This is a quick guide to help you understand how to mount your StoreYourBoard product. If you have any questions, please feel free to contact us at info@storeyourboard.com. Thanks for your purchase! Wall Mounting The majority of StoreYourBoard products are designed to be wall mounted. When wall mounting, there are a variety of factors to consider such as the mounting surface, installation hardware, and the expected load bearing weight. Stud Installation When possible, you should always mount your rack by screwing into your wall’s studs. Studs are the vertical wood supports inside of your walls that provide structural support for your home and a place to hang your drywall. Finding studs inside of your wall can sometimes be a tricky proposition, but luckily there are a few tools and techniques to help you out. The easiest way to find a stud is to use a stud finder tool. These are handheld electronic devices that make finding studs very easy. If you don’t have a stud finder, then you can still find studs but it’s a bit harder. One of the most helpful tips is that studs are typically spaced 16” apart on center. This means if you can find one stud, then chances are good that there is another stud 16” to the left and right of it. One technique of locating studs without a stud finder is to look for clues in the trim. Trim is supposed to be nailed into studs, so if you can find evidence of nails (i.e. painted over nail heads or small holes) then chances are you’ve found a stud. Another way to locate a stud is looking for electrical switches or outlets. Light switches and outlet boxes are typically screwed into the side of a stud, so this should help you pinpoint where your studs are. Drywall Installation Drywall installation should only be done if there is absolutely no way to mount into your wall’s studs. Also, drywall installation should never be used to hold anything greater than 10lbs! Drywall is simply plaster plus paper, so it is not designed to take structural loads. If you must install into drywall, then you should use some sort of drywall anchor and not solely wood screws. Drywall anchors are little devices that help make screwing into your drywall safer. Drywall anchors come in a variety of shapes and sizes, but their purpose is the same. They are designed to help distribute the load on your drywall making the screws less likely to be pulled out. StoreYourBoard provides the threaded “EZ-anchor” style drywall with select products. This anchor is easy to use because it can simply be screwed into drywall with no special tools. Brick, Plaster, and Other Material If you’re looking to wall mount your StoreYourBoard product into something other than a traditional interior wall, then you’ll need to do things a little differently. Unlike most interior home walls, brick and plaster don’t have convenient wooden studs to screw into. The recommended way to mount into brick and plaster is using dedicated anchors like you would for drywalls. Go to your local hardware store and you should find specialized anchors (i.e. masonry anchors) for your specific wall material. In most cases, you’ll want to drill into the mortar because it is less brittle and easier to repair than brick or concrete. Ceiling Mounting Ceiling mounting your StoreYourBoard product is very similar to wall mounting in that you must consider the mounting surface material, installation hardware, and expected load weight to properly install your product. Beam Installation Many people know their walls have studs, but not everyone knows that there are also beams or “studs” that are in the ceiling. These serve the same purpose as wall studs in that they provide structural integrity to your home and provide a way to hang drywall. If you plan to ceiling mount your product, then you MUST screw into a ceiling beam. Unlike wall mounting where you have the option of using drywall anchors, you cannot use drywall anchors for ceiling mounting. If your ceiling is unfinished (like in some garages), then locating the ceiling beams is trivial. If your ceiling is finished with drywall, then you can locate a beam in the same way that you locate a drywall stud. Brick, Plaster, and Other Material Similar to ceiling mounting in these materials, you’ll need to install using specialized anchors. For instance, if you’re mounting into brick then you’ll need masonry anchors to ensure a proper installation. In most cases, you’ll want to drill into the mortar because it is less brittle and easier to repair than brick or concrete. Rack Spacing There are 2 main things that should be considered when determining your rack arm spacing: number of boards stored and wall stud location. If your rack is designed to hold only one board, then determining how to space your rack’s arms is pretty straightforward. If your rack is designed to hold multiple boards, then you will need to accommodate all of the different length boards you plan to store. Single Board For mounting a single board, we recommend using the rule of 3rds or 4ths. What this refers to is where the rack should support your board relative to the length of your board. For example, if your surfboard is 9ft long and you used the rule of 3rds, then you would want the rack arms to land 3ft in on each side of your board. As another example, if your board was 6ft long and you used the rule of 4ths, then you would have the rack arms land 1.5ft in on both sides of your board. Multiple Boards If you have a rack designed to hold multiple boards, then you’ll need to do a little more planning than a single-board rack. The key thing to remember on a multi-board rack is that you need to space the rack arms narrow enough to accommodate your shortest board. For instance, if you have shortboard and longboard surfboards, then you’ll need to make sure that the rack arms are close enough to fit your shortboard. Another thing to consider when spacing your rack arms is where your board’s bindings/fins/boot etc are going to land. Depending on how you store your board and what type of board you have, you’ll want to make sure these features don’t align with the rack arm. Of course, one easy solution is just to slide the board over a little, but this will offset the symmetry and it won’t look as cool! The last thing to consider is that mounting into a stud or other substantial surface is mandatory due to the increased weight of a multi-board rack. This ads a little to the challenge because you’ll need to find a set of studs close enough to fit your shortest board, but not so close that it makes your longest board unstable. Ceiling Racks Mounting into your ceiling is really no different than mounting into your wall when considering the rack arm separation distance. For instance, you’ll still want to consider where ceiling beams are, the length of your board, and whether or not your rack holds multiple boards. The one difference we propose is using the rule of 3rds instead the rule of 4ths. This will provide a little more “safety factor” that will ensure little bumps into your board don’t turn into catastrophic damage! Have questions? Please feel free to contact us at info@storeyourboard.com. Please use this guide to help with your installation but understand that StoreYourBoard (SpireLLC) is NOT responsible for improper installation or damage.

Learn more

Top 10 Reason you Need a Skateboard Rack

1. Great way to Organize your House, Garage, Basement, Room, etc2. Skateboards are NOT cheap – protect your investment. 3. Skateboard laying around are slip, trip, and fall hazards, especially for those non-skaters in the house.  4. Ready to Go when you are – Having a dedicated Skateboard Rack you will always know where your board is and it will be waiting for you when you want to go ride. 5. You spent the time and money to get the perfect skateboard setup – why not show it off? 6. Removes Clutter – Some people will appreciate this more than others!7. Extended Life – Your skateboard takes a beating when you are riding it, no need to beat on it more when you are not riding it.  8. Art for your house- Get a skateboard deck mount and display your favorite decks, those special autographed decks, or just that deck with the awesome graphics. 9. Great for small/cramped living arrangements (dorm rooms, apartments, condos, etc). Hang up your skateboard and get it out of the way so you aren’t constantly tripping over it.  10. As your skateboard quiver increases you will run out of places to stash all those boards. Check out our 7 skateboard and 8 skateboard racks. Our special extra bonus grand finale ........ 11. If you were a Skateboard would you want to be thrown in corner?!?

Learn more

Best Surfer Gifts - Top 10

If you need to get a gift for the surfer in your life, here is the list you need. Any of these gifts should excite a surfer, but you should try to monitor what they currently have and anything they have been recently talking about to get the BEST Surfing Gift. Small Gifts: 10). Surfboard Wax - This is the practical gift. It is small, inexpensive, and used by basically every surfer. 9). Surfing DVD - Try a new release or pickup a classic. These should satisfy the surfer need, even when they can't go out and ride the waves. Larger Gifts 8). Rash Guard - Solid gift, useful yet personal. Get a new style or color if they already have one. 7). Surfboard Wall Storage Rack- It is tough to find a good place to keep and store your board when they aren't out in the ocean. Do them a favor and get them a surfboard rack to properly store their board(s) and also organize their house. 6). Bodyboard - I know these are surfers, but the ocean doesn't always cooperate and produce surfable waves, especially if you don't live nearby a consistent break. A bodyboard is a great way to get out in the ocean and ride the shore break or other waves that are not ideal for surfboards. 5). Surfboard Car/Truck Rack - If they are just getting into surfing or want to take their surfboards to some breaks you need to drive to, a surfboard car rack is essential. There are many different types and styles. Get one that fits their ride and your budget. 4). Surfboard Bag - If a surfer travels with his/her board, then they need a board bag. Most surfers have multiple bags. Even when not traveling with the board, a surfboard bag can keep the dust and dirt away and provide a little protection from dings and scrapes. 3). Wetsuit - If they don't have a wetsuit, they need one PERIOD (with the small exception of some tropical islanders). Having a wetsuit makes it more comfortable to surf in many locations and also extends your season. If they already have one, chances are they could use a different one for different conditions, whether it be a heavy full suit for winter surfing or a spring suit to enjoy the surfing shoulder season. 2). Surfboard - Please be cautioned - you need to know the surfer extremely well before you buy them a board. If you know what they want then make sure to get the exact board. Surfers are particular about their boards, so don't just go get a random surfboard. If you are buying a beginner board to get into surfing, than talk with a surf shop and they can point you in the right direction. 1). Surfing Destination Trip - The #1 Best Gift for a Surfer is a Destination Trip. You cannot beat a surf trip down to Indo or the Gold Coast. This would be an unforgettable experience and something they might even share with you. Good luck with your choice...all of these are good options for the true Surfer. Josh Gordon is the owner of StoreYourBoard.com, a leading supplier of surfboard racks.

Learn more

Surfing Articles

Surfboard Racks Best Surfer Gifts - Top 10 If you need to get a gift for the Surfer in your life here is the list you need. Any of these gift should excite a surfer but you should try to monitor what they currently have and anything they have been recently talking about to get the BEST Surfing Gift... more

Learn more